Getting started
Set up BothSync
Updated 28 October 2026
From install to the first synced task takes about ten minutes.
The demo video on YouTube shows the same steps, from install to daily use.
Before you start
- In HubSpot you need permission to install apps. Super admins have it. Any plan works, Free included.
- In ClickUp you need an account in the workspace your projects live in. BothSync acts as that account, so it creates tasks only in lists that account can see, and its comments in ClickUp appear under that account’s name. Choose an account that will stay in the workspace: if it leaves, the sync pauses.
- BothSync connects one ClickUp workspace to each HubSpot account.
1. Install BothSync in HubSpot
Open the install link while you are logged in to HubSpot, choose the HubSpot account, and approve the access BothSync asks for.
2. Confirm the “unverified app” notice
BothSync is in beta and not on the HubSpot App Marketplace yet, so HubSpot asks you to confirm that you trust it. Type I accept the risk and continue. The notice goes away once BothSync is listed.
3. Connect ClickUp
BothSync then shows “HubSpot is connected”. Click Continue to ClickUp. If you don’t use ClickUp yet, first create a free account with the link on that page: ClickUp’s sign-in page has no sign-up option. In ClickUp, select one workspace, the one your projects live in, and connect it. You then see “BothSync is connected” with a link to the settings.
4. Add your first rule
In HubSpot, open Settings (the gear icon) → Integrations → Connected Apps → BothSync → Settings, and click Add rule.
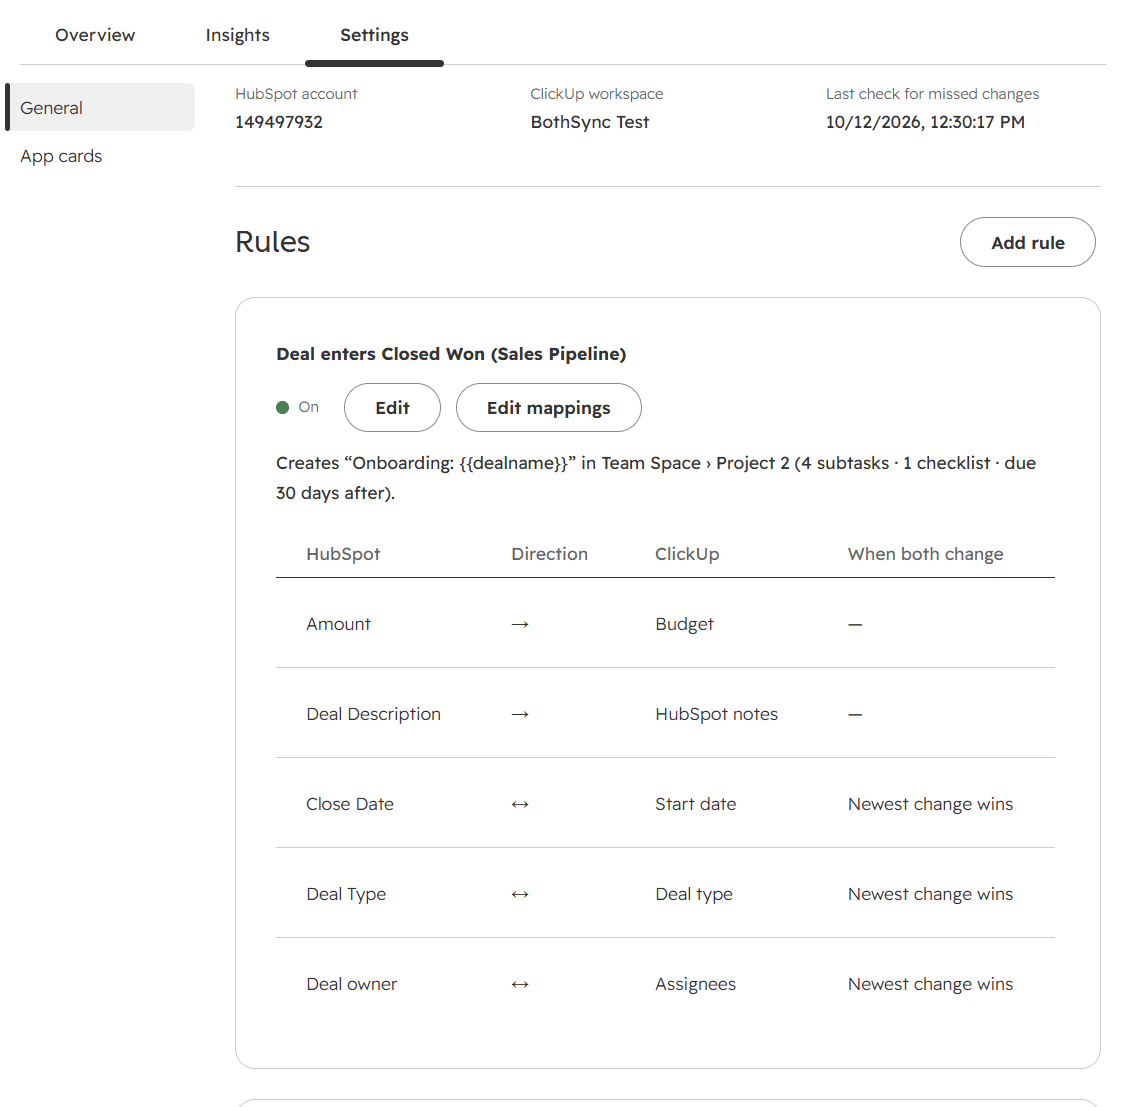
- Start when a deal or ticket enters a stage, or a company reaches a lifecycle stage.
- Create the task in ClickUp list: where the new task goes.
- Task name: put in values from HubSpot with
{{property}}, for exampleOnboarding: {{dealname}}. - Optional: a description, a due date, who the task is assigned to, subtasks, checklists, and the stage the record moves to when the task is done.
A rule acts on records that reach the stage after you save it. Records already in that stage are left alone. Rules and task templates explains every option.
5. Choose the fields to keep in step
This step is optional. Next to the rule, click Edit mappings and pair a HubSpot property with a ClickUp field. Pick a direction for each pair, and for both ways, what wins when both sides change. Field mapping lists the field types that pair up.
6. Show the ClickUp card on your records
HubSpot does not place app cards by itself. In BothSync’s settings, open App cards → Manage locations. On the Deals tab (the window may open on another one), tick ClickUp (BothSync) next to Default view under Record Page. Do the same on Tickets and Companies if a rule starts work from them, then click Save. The Get started list in the settings links straight to App cards.
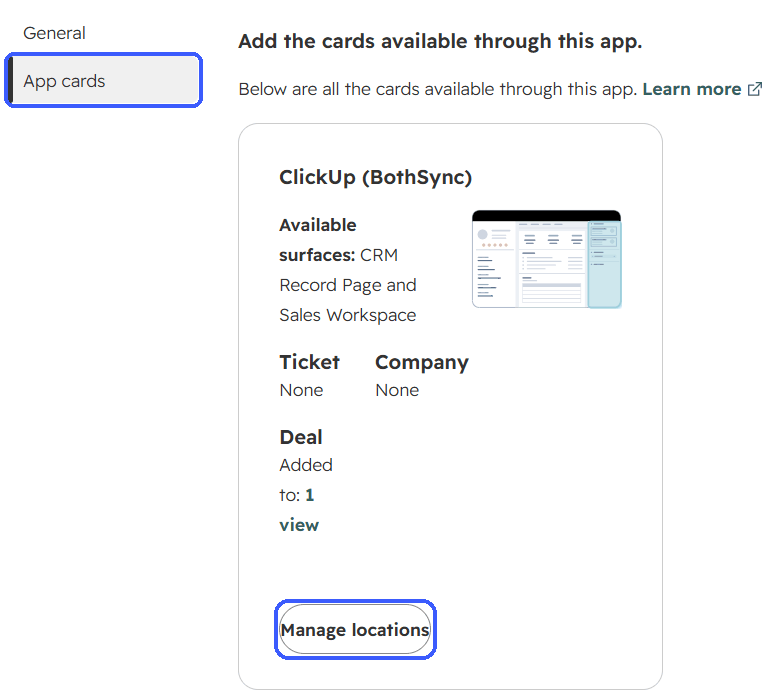
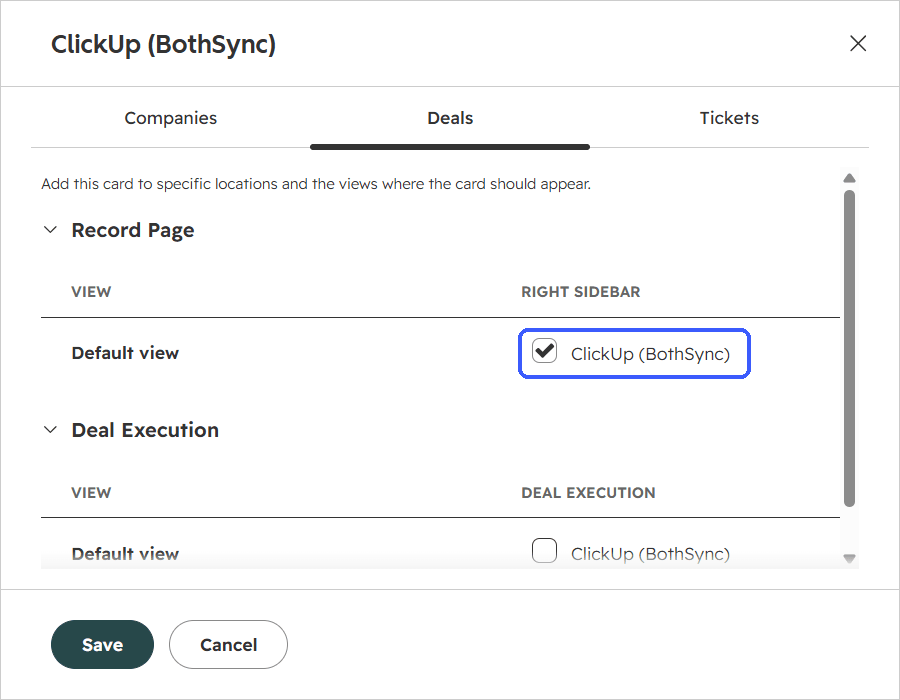
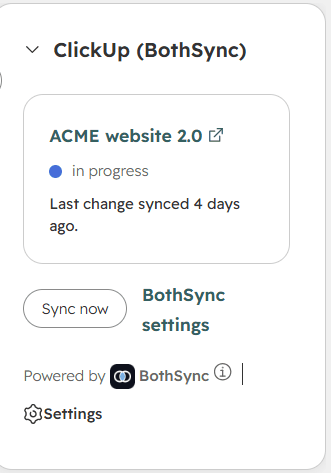
The card then shows in the right sidebar of each record. BothSync in HubSpot describes what it shows.
7. Try it
Move a test deal into the stage your rule starts from. The task usually appears in ClickUp within seconds, and the deal’s card shows it.
If nothing appears within five minutes, open Recent activity in the settings: it says what BothSync did and, if it skipped something, why. See Activity and troubleshooting.
8. See a change come back from ClickUp
In ClickUp, mark the test task done. Then reload the deal in HubSpot. Three things change:
- The card shows the task's status in green.
- The deal's ClickUp status property has the new status. HubSpot does not show it in the sidebar by itself, so look under View all properties.
- The deal's timeline gets a ClickUp task completed entry. HubSpot hides app entries at first: on the Activities tab, open the Activity filter and tick BothSync under Integrations.
The deal stays in its stage, unless the rule names a stage to move it to when the task is done.